October 2011 | Green Patches - Mediterranean Gardening

Saturday, October 8, 2011

How to tell the Penwiper has propagated successfully

Leave a Comment
Kalanchoe Marmorata
Kalanchoe Marmorata Standing Tall

This past week I learnt how you can tell that a Penwiper has taken roots. 


When I first got the Marmorata stem and planted it, it was hortizontal looking down, it was just a 'lifeless' stem planted in a pot.  After just a week I noticed the plant has risen and is now looking up, as you can see from the bend in the photo.

I didn't expect this behaviour especially since we got alot of heavy rain this week and the soil is still wet from when I first planted it.  I noticed the leaves have also opened up more.  They were closed when I first got it except for the bottom two leaves.  Now it looks like the plant is standing on it's feet showing off :)


The plant is taking shape now and this is how it's supposed to look.  The leaves should open up more and only the top part should remain closed like this so hopefully in the next weeks I can see it flourish more.  This is a good sign that the plant is alive now and has taken well to its surroundings.

Read More...

Tuesday, October 4, 2011

How NOT To Compost

Leave a Comment
Here I illustrate all the mistakes and lessons learnt from my first attempt at indoor composting. 

In my previous post I mentioned that I want to try vermicomposting.  Basically this means getting red worms to do all the work for you, feeding them gradually until you a get nice rich compost.  My first problem was that apparently you cannot find them or even import them to Malta, so that was out of the question. 

Undeterred I bought my plastic boxes and set out to just the samem, succumbing to the normal composting process.  I drilled some holes on the side and the bottom (for drainage) of one box and filled it up with the following:

Browns:

Soil and compost from previous unfortunate plants which have passed away.
Shredded paper and news papers.

compost bin
My Browns

Greens:

All the foliage I had collected from my newly pruned Plumbago.

The ratio should be 4 parts brown to 1 part green to kick off the composting process.  I filled it up to about three quarters full of browns and just added some greens thinking I will just add more later as I collect kitchen left overs.  I closed the box and left it as is.

<><><><>
</>
compost bin
My Greens
The next day I had collected some rotting bananas and banana peels, a lemon and some tomatoes.  I put them in as well.

compost bin
More Greens


Needless to say by the evening my yard was infested with fruit flies, and I hadn't even added water.  I went to add some more lemon peels today and I was horrified when they all flew out at me.  I have one section of the wall in my yard covered.  Thankfully I didn't try to do this inside!

I have come to the conclusion that after just a few days I would be better off throwing everything in the bin and start again, here is why:

List of Mistakes and Solutions:

1. You need to actually measure of have a rough estimate of the 4:1 ratio.
2. You need to collect the kitchen left overs until you get enough then you can throw it in the bin.
3. Collect the kitchen left overs in an airtight box in the fridge.
4. Once you get a good ratio give it a good mix and leave it so composting can begin.
5. Mix it up for air occasionally to speed up decomposition.
6. Add water but don't let it settle at the bottom - it needs to be damp not wet.
7. Do not keep adding in greens and browns as the composting process will never finish.

Things I wish I knew:

Fruit flies are especially attracted to banana peels !


So there you have it, my first attempt failed, tomorrow I need to get rid of all those fruit flies and get rid of the contents of the box.  Better luck next time!


Read More...

Plumbago - How to determine sunlight requirements

1 comment

In this article I discuss how you can tell if a Plumbago is getting too much or too little sun.

Too much sun:

I have noticed that a plumbago can actually get too much sun.  If left in full direct sunlight at a temperature of around 95F to 100F (35C to 38C) which is what we get here in summer the flowers will turn yellow.  They will look bleached and wrinkly.  If the plant is not getting enough water the foliage will start getting yellow but still with sufficient water the flowers will lose their color.  If placed in partial shade but lots of filtered light the new flowers will resume their original color which in my case is lilac.  The flowers which have already bloomed will still be yellow so don't expect them to change color.

Too little sun:

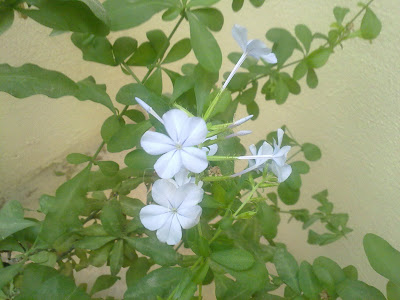
If the plant is not getting enough direct sun or is in full shade all the time, the new blooms will be white.  They will also be smaller than normal, it seems like they were forced to bloom.  Even flowers which are covered in foliage and are not getting direct sunlight will turn out white.  Moving the plant to a sunnier place or a place which gets lots of filtered light should restore the color.

In my case my plumbago gets around 4 to 5 hours direct sun a day and for the rest of the day it gets lots of filtered light.  In the summer this is too much for it so I move it to a shadier spot but it still gets lots of light.  When I see that the new blooms are losing their color (this happens gradually in my case) I move it back out to a sunnier spot normally when the temperature start dropping.

Here's an illustration of flowers in the sun and flowers in full shade.  If the whole plant is getting paler or white flowers it's a good sign that it needs more sunlight.

This has nothing to do with watering needs which I always make sure are adequate.  Normally if the top two inches of soil are dry it's a good indication, then it's just a matter of increasing frequency in summer and reducing it in winter.


Plumbago Auriculata, Flowers
Plumbago in the sun

Plumbago Auriculata, Flowers
Plumbago in full shade


Read More...

Monday, October 3, 2011

Kalanchoe Marmorata (Penwiper Plant)

Leave a Comment
kalanchoe marmorata penwiper
Kalanchoe Marmorata

The latest addition to my succulents is the Kalanchoe Marmorata, also known as the Penwiper Plant.  Here is some general information about this succulent which I collected. 

This plant is a perennial and can be propagated from seed or cuttings in Spring or Summer, since it's the beginning of October now I hope it will stabilise.  This plant enjoys full sun to partial shade so I am not too sure how well it will do in my yard.  It does get alot of light however.  It can grow up to 6 inches tall, which is just about the height of this cutting.  This kalanchoe will bloom white flowers in Spring, over 5cm in spread. 

I got the cutting yesterday from a much bigger plant and placed it in a pot of compost about 4 inches deep.  There is some leaf damage, possibly due to too much sun or too little water.  The spot I chose for it does not get alot of direct sunlight and there is good airflow so in time it should recover.  I may also have placed the plant in too big a pot however I would like this one to spread, it's got such lovely foliage. We don't get any frost here so it should be ok if left outside during the winter months.

I didn't find alot of information about watering needs, other than the fact that it's a succulent so water alot in summer but a little in winter.  All in all this plant should make a nice addition to what I am now calling my succulent shelf.


succulent shelf
My succulent shelf


Read More...

Saturday, October 1, 2011

Plumbago - Pruning for Winter

4 comments
Today is the day I took a leap of faith and pruned the Plumbago for the coming winter.


Following my light trim I decided it was time and I read so many articles which said that it doesn't really matter when and how much you prune a Plumbago it will come back stronger than ever.  I saw a picture of one pruned all the way to the ground!  I didn't go so far but I definitely took off a big chunk.  I would say a third of it is gone which should be ok (I hope).

plumbago auriculata pruning trimming
Plumbago before pruning

I decided to cut off all the right section which is trailing on the ground.  That section has been hard to keep under control and I decided to cut all of it out and then control the stems better when they start growing back.  

I took the shears and cut the main stems straight off careful to keep a 45 degree angle.  I didn't manage at first and the stem broke off in a million pieces.  This is dangerous for the plant as it can bring disease.

plumbago auriculata pruning trimming
Cutting the stem incorrectly
plumbago auriculata pruning trimming
Cutting the stem correct at 45 degrees

I realized it's actually very simple to do this if you hold the shears straight.  I was trying to hold it at an angle...  I made sure to cut down the stems to where there where new buds so as to encourage growth at the lower end of the plant.

plumbago auriculata pruning trimming
Stems cut off
It was a bit hard at first because I cut off so many flowers and buds :(  To think it took all year to get some decent growth out of the plant and now I cut a lot of it off.  I believe however that in the end it will be worth it and I will have denser foliage and a spurge of flowers as soon as it recovers.  I transferred the plant to a sunny spot on our roof now because I was not getting enough sun in the yard.  

Here it is nice and pruned:

plumbago auriculata pruning trimming
Plumbago after pruning

I wanted to trim off the parts on top as well to shape it a bit better but I was afraid to, I thought perhaps I would be chopping off too much.  The soil is still damp from this week's rain so I let it be.  When it dries I will give it some fertilizer  to help it a bit.  The sun will also be beneficial I think, let's hope it doesn't rain any time soon to give it some rest.


Read More...