Green Patches - Mediterranean Gardening

Saturday, May 18, 2013

Of Sparrows and Gas Heaters

10 comments
The yard where I keep all my plants is also used as a utility area which houses things like gas bottles (we don't have direct gas connections in Malta), and a gas water heater.  A couple of weeks ago we noticed that the water heater was not heating as well as it used to, and so my partner decided to take a closer look.

A couple of twigs jutted out of the outer cover, but nothing could have prepared us for what was inside.  It seems a couple of sparrows had decided to make the heater their home for Spring.  Every cavity was filled with twigs, pieces of hay, pieces of grass, and even plastic.  The burners that are used to heat the water are further down, but I can guess they realized that this was a warm place to build their nest in.  Not that they need warmth in this weather.  The obvious problem for us was that the fumes from the burners could not get to the chimney because of all that nesting material.


gas heater nest
Gas Water Heater Nest
As we removed all the twigs and material from the gas heater I could see the male sparrow flying overhead chirping.  I can image their disappointment as they saw us destroying weeks of labor in half an hour.  We ended up clearing half a garbage bag of the stuff.  Next we closed off all possible entry ways with wire mesh.  

gas heater closed
Entry ways closed off
Since we evicted the couple rather ungraciously, I bought them a bird house, and we hung it right next to the gas heater in the hope that they can make it their new home.  It's much smaller than their chosen location, but that's all they get I'm afraid.


bird house


Job well done we were ready to call it a day.  I stood in the kitchen which leads out to the yard, and then I saw Mr Sparrow flew over to investigate.....

sparrow
Mr Sparrow assessing the damage done

sparrow
Mr Sparrow flying down for a closer look


sparrow
Mr Sparrow accusing me
sparrows
Mr Sparrow calling out to Mrs Sparrow
sparrows
Mr and Mrs Sparrow eyeing their new home

Will they go for it?  Not yet.  

They still come occasionally, but I don't think it will happen this year.  We are in peak Sparrow mating season right now with countless sparrows chirping away building their nests and laying their eggs.  Some birds are already being born (they sometimes fall out of their nests onto the street :(  ) I think it's too late for them to start over now.

Maybe next year.
Read More...

Monday, May 13, 2013

A Walk In The Country - Qrendi

6 comments
Today I went for a short walk in a small village called Qrendi.  Qrendi is situated in the south west of the island, and is mainly composed of farmland.  I walked along the outskirts of the village from another small village called Mqabba up to St Matthew's church.  

This short walk is one straight road with farmland on one side, and the village on the other, as you can see in the image below. In the distance is another village called Zurrieq.  (Yes Malta is that small).

qrendi field
Typical field in Qrendi
qrendi field
Another typical field with prickly pears in the foreground
Walking along the street, a long rubble wall with prickly pears leaning against it is the only thing separating the fields from the traffic zooming by.  Prickly pears are a staple plant in the Maltese Islands , and even featured on our national emblem before it was replaced in the late eighties.  

malta emblem
Malta's national emblem till 1988
Prickly pears are commonly grown at the edges of fields along stone walls to protect the crops from high winds.  As a result of this, the fruit is for anyone's taking.  

malta prickly pears
Prickly pears from street level

malta flower prickly pear
Flowering prickly pear
Apart from the prickly pears I also came across these very tall flowers.  They must be over ten feet tall, and I can't quite find a name for them.  They could be Danish Hollyhock, but they are slightly different.  Does anyone know what these are?  I have also seen them in people's gardens, and they are cultivated, not found naturally here.

qrendi hollyhocks
Very tall flowers

qrendi hollyhocks
Danish Hollycock?

Horses are also a common sight in the streets of Qrendi.  I came across four in my short walk, trotting away in the street, oblivious to the cars rushing by beside them.  The owners ride them up and down the same street a couple of times, supposedly for exercise, although I have seen a couple racing the horses; they just couldn't resist.

qrendi horse riding
Horse riding in the street

Towards the end of my journey, the buildings start making way to farmland.  Most fields have been growing potatoes, and have been harvested by now.  Here is a typical farmland setting complete with electricity pole standing in the middle.

qrendi farmland
Farmland

qrendi farmland
Freshly harvested field
At the end of my journey I come across the church of St Matthew.  This is not the main church of Qrendi, but a small chapel, one of six in a village of a few thousand residents!  This chapel, however houses what is most probably the oldest crypt on the island supposedly dating back the the 14th century.  

st matthew chapel
St Matthew's Chapel
The interesting story about this chapel though, is that in 1343 a tremor created a crater, 130 feet deep, right behind the chapel, but it was left standing there unharmed, and remains there to this day.  In the image below you can see the church marked in red, and the crater, now full of trees and shrubs behind it.  People can see the crater today via steps on the side of the church, but no one is allowed to go all the way down.

qrendi maqluba
Aerial view of the church and the crater thanks to Google Maps
st matthew chapel
Chapel at the edge with steps going down to the crater

I hope you enjoyed my walk through Qrendi. This short walk and few pictures capture the gist of Maltese farmland.  Across the country pockets of land like this still exist, giving us crops that no importer can match.  Unfortunately they are shrinking every year as reckless development increases.  I only hope that Qrendi will be one of the last villages to be swallowed by the concrete jungle that is turning our island into yet another European metropolis.


Read More...

Friday, May 10, 2013

Of Mint, Rosemary and Basil - A New Approach!

2 comments
The other day my better half went grocery shopping, and came back with three pots of rosemary, basil, and mint.  Since we were not going to use the herbs for another few days, and most probably not all at once, I decided to place them in bigger pots in the yard.

I have tried to grow basil and rosemary before with some success.  The basil was always grown up on the roof in full sun, and it was always a success, but we had to make sure that we watered it almost every day.  Rosemary was not as successful, believe it or not, the summer sun was a little too much for it, and despite watering it regularly, it died pretty quickly.

I have come to realize over the years that when you read, 'requires full sun' on plant instructions, there is a big difference between say, full sun in England (sorry guys :) ), and full sun in Malta.  Our sun can be a bit too much, and normally all plants here can live with bright conditions in bright places away from direct sunlight.  Imports that come from European countries further north from us especially.

When it comes to herbs, I have always shied away, thinking I don't have enough space in the yard, and it was too inconvenient on our roof top.  This time however, I have decided to give it a try.  

 So here we start with Mint:

Mint
Mint
I have actually read that Mint can grow everywhere so I will be pretty disappointed if this plant dies on me.  Apparently it requires partial shade and soil kept moist, not too soggy and not too dry.  I should be able to enjoy this plant all year round in our climate since we do not have any frost, and our winters are quite mild.  The rain might be an issue, but the plant can be taken indoors during Winter.

Next on the list is Rosemary:

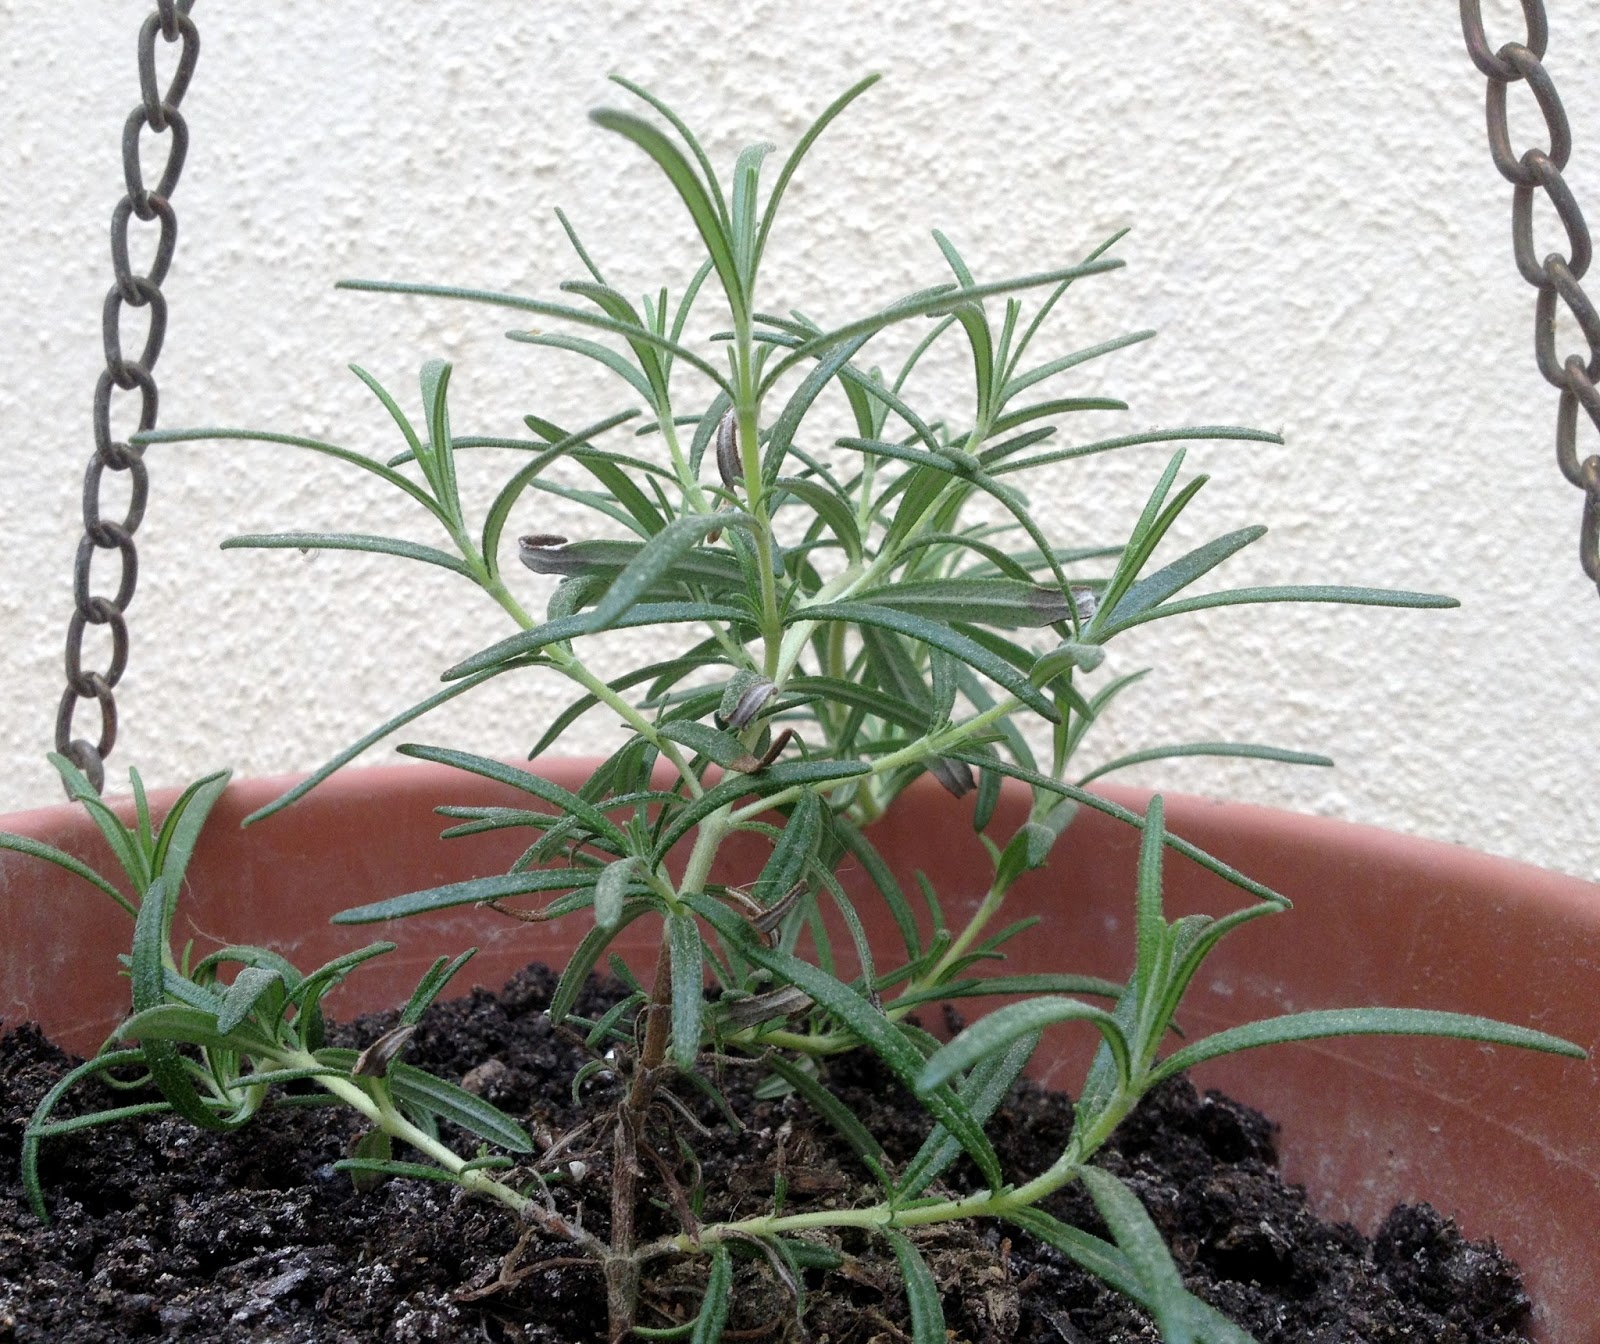
Rosemary
Rosemary
I placed the Rosemary in a hanging pot because it is a spot that gets the most sun.  This plant should require little watering, and no fertilizer.  I read that if you cut sprigs regularly it should keep growing happily without any problems.  I did not manage to save my plant past a few months last year, it was however planted together with Sage.  I have a feeling that here may have been some competition for resources there.  Let's see how well it does in its own container this time around.

And finally, back by popular demand, Basil:

Basil
Basil
This plant should also require lots of direct sunlight and as long as the soil is kept moist there should be no problems.  We did have success growing basil in full sunlight in the past, let's see how well it does in its current location where it only gets some morning sun.

So there they are the three contenders this Spring.  Now for the new approach.  We have decided to ignore all the instructions, and planted all of them in compost.  We have placed the Mint in a shady spot where it gets bright light, but no sunlight.  The basil and rosemary do get some direct sunlight in the morning, but for the rest of the day they only get bright light till evening.  We can keep an eye on them, and water them only when necessary (when the soil is almost dry).  

We will also take sprigs and leaves when needed. Basil is always in high demand in our household as it goes well with most Mediterranean meals. It is also easy to freeze. We usually use rosemary in Winter with a good leg of lamb or chicken.  It does wonders with fish though, so I will definitely use it in Summer.  Mint is not a favorite of mine, however it is also great with fish, and to make sauces and dressing, plus who can say no to a refreshing Mojito in summer?


Read More...

Wednesday, May 8, 2013

Plumbago Resilient After Heavy Pruning

5 comments
This morning I got a great surprise, the Plumbago survives to see another Spring!  A couple of weeks ago the Plumbago seemed like a gonner, it was all dried up with no leaves at all, and hardly any good branches left.  Usually by this time of year I would be enjoying some lovely purple flowers, but this year it was not to be.

dried plumbago


I cut all the dried branches all the way to the bottom of the pot.  Where I saw that the inside was the branch was still yellow and supple, not dry and dark brown, I stopped cutting.  I watered it regularly, but did not give it any fertilizer, for no particular reason.  Perhaps I thought it was no use, and it would not survive the heavy pruning.

Plumbago after pruning


As you can see from the image above the inside of the branches where I stopped cutting look like they have some life in them still, and there were a few green leaves.  

The green leaves have now dried up, but this morning I saw new branches, and leaves sprouting out of the branches.

Plumbago taking life again

New Baby Sprouts

They are small signs of life, but life none the less.  This gives me hope that even though I pruned it right in the middle of Spring, it will still recover.  Since it rained yesterday I have not watered it, and have not given it any fertilizer yet, but I will next time I water it.  Who knows I might still get a few flowers for Summer after all.

One thing's for sure, this plant is as resilient as I read it is and it seems like no matter how much you prune it, it will keep coming back.  :) 

Here's an update just three weeks later!

Plumbago Pruned
Plumbago Foliage 

plumbago leaves
The Leaves Seems Bigger!


Read More...

Friday, February 8, 2013

Schefflera Yellow Leaves and Sticky Leaves!

Leave a Comment
schefflera scale
Image Source

The Schefflera hasn't been doing so well lately.  I have been noticing that it is looking rather depressed, hardly requiring any water, the leaves are turning yellow and dropping occasionally, and no new growth is showing. I used to think this plant was very hardy, and required very little maintenance, but I guess this is only true when the right conditions are met.

When I moved my plant indoors in September of last year I placed right next to a big window, so it could get as much light as possible.  About one month later I noticed that the leaves were turning yellow, and at first I attributed this to the fact that I wasn't giving it enough water.  Scheffleras, however, give out opposite signals when it comes to water requirements, if the leaves turn yellow or have yellow spots it means too much water, whereas leaves that turn blackish in color means that it is not getting enough.  

Another thing I noticed was that the leaves at the bottom started falling off.  This was definitely a sign of over watering, so I stopped watering the plant altogether.  This had little effect, and over time more leaves started going yellow.  I was now beginning to panic.  This plant was huge and healthy, the only thing I ever did to it was give it a good pruning, and I was starting to fear that I may have over done it.  

If this wasn't enough, I then noticed that the green leaves had this shiny coat on them, and were sticky to the touch.  Upon further investigation, the floor area around the pot was also sticky.  I had noticed this almost immediately, but I didn't think it was the plant that was producing sap.

I did some research, and I found out that the sap could actually be a scale insect infestation.  These insects suck the juices from the plant, and then secrete a form of sap on the leaves. Scale insects are brown stubs, like small buttons, that attach themselves to the stems of the plant.  Their bodies are quite hard and they can be seen easily with the naked eye.  As far as I can tell, my plant is clear. Aphids also produce a sticky substance called honeydew, but I found none on the plant.

Eventually I decided that the best course of action was to take it back outside.  I had this plant outside for three years, and it was quite healthy.  The moment I took it inside it started growing weaker.  A couple of weeks went by and the plant started showing signs of recovery.  It dropped the leaves that were too far gone, but those that remained started turning green again.  I did not water it at all during this time.

A few weeks later I started seeing new leaves starting to grow, and by now the plant was full of green leaves, and all the sticky substance was gone.  It rained a few times, and water seems to have given new life to the Schefflera.  I never saw any insects or brown spots that made me suspect that the plant was infested.

I now believe that the problem with the Schefflera was lack of light, and ventilation.  We hardly ever open the window where I placed it, and even though it was right next to a big window, the curtains, which are sheers, were still blocking too much light.  I'm glad that's all it was, I got a good scare with the results returned online, but you never can be too careful.

Read More...